A New Year’s Revelation for 2020

Do you ever have one of those realizations that immediately makes you think, “Why the hell didn’t I realize this sooner?” I had that kind of thought recently, when I was looking back at the few things I’ve sewn for myself this year. Being busy with moving into a house that required renovations and starting a new job, as well as a need to revise my antidepressant medications, has meant that I have not had much time or energy (mental, mostly) for sewing. And yet, because of that new job, I really need to be sewing more work-wardrobe garments.

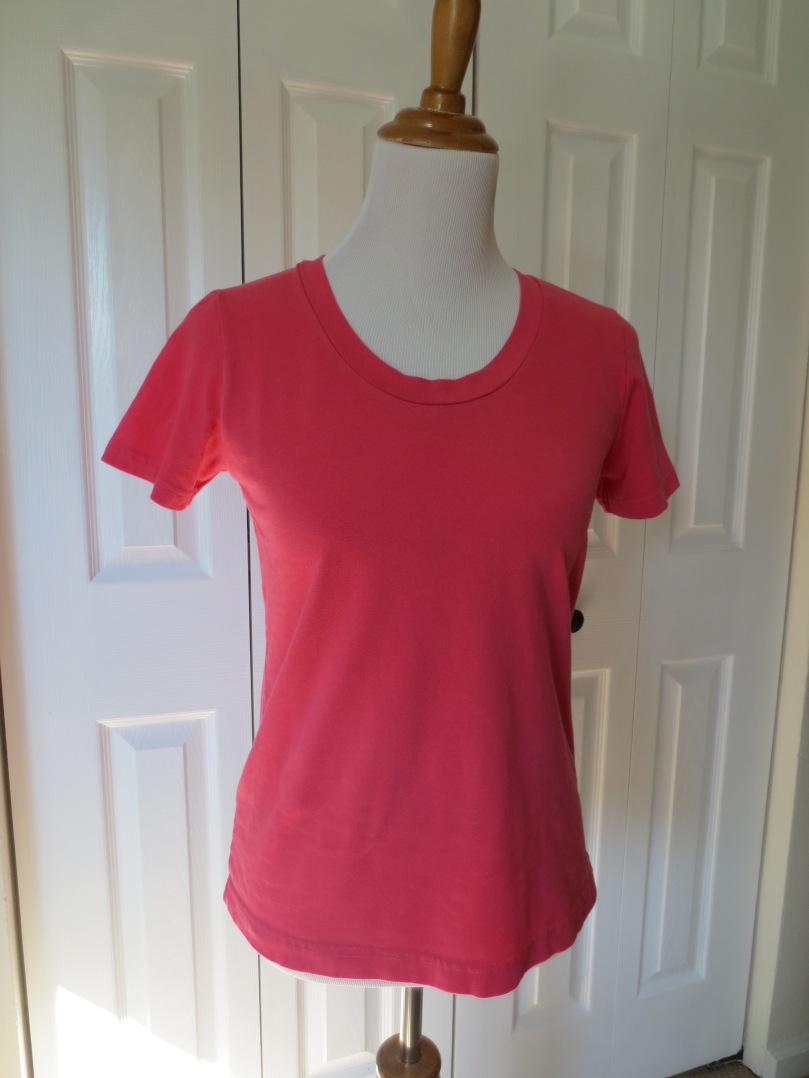
In an effort to give myself some more options for work-appropriate tops than just the 3 store bought polo shirts that I have been wearing for the past several months, I made up two blouses, as well as two t-shirts. The two t-shirts became regular parts of my at-home wardrobe, while the two blouses….continued to sit up in my sewing room, finished but unworn.

Aida as drafted

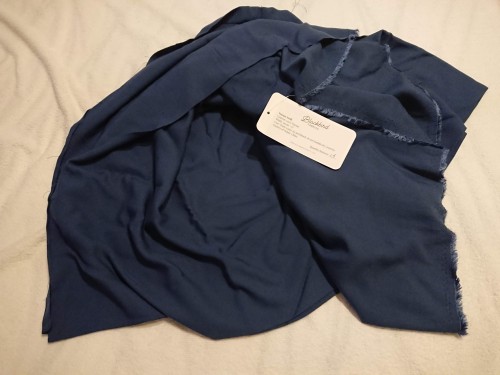
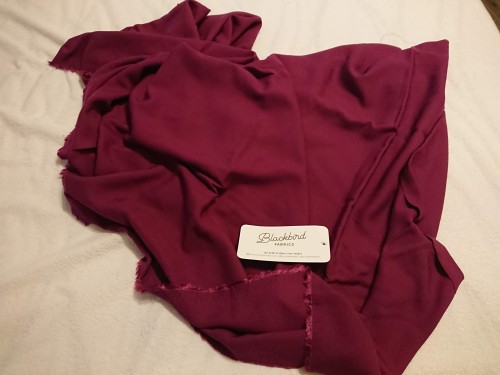
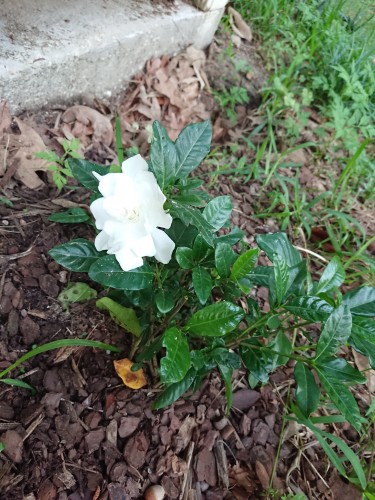
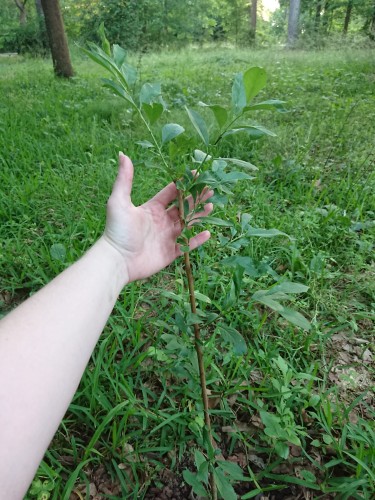
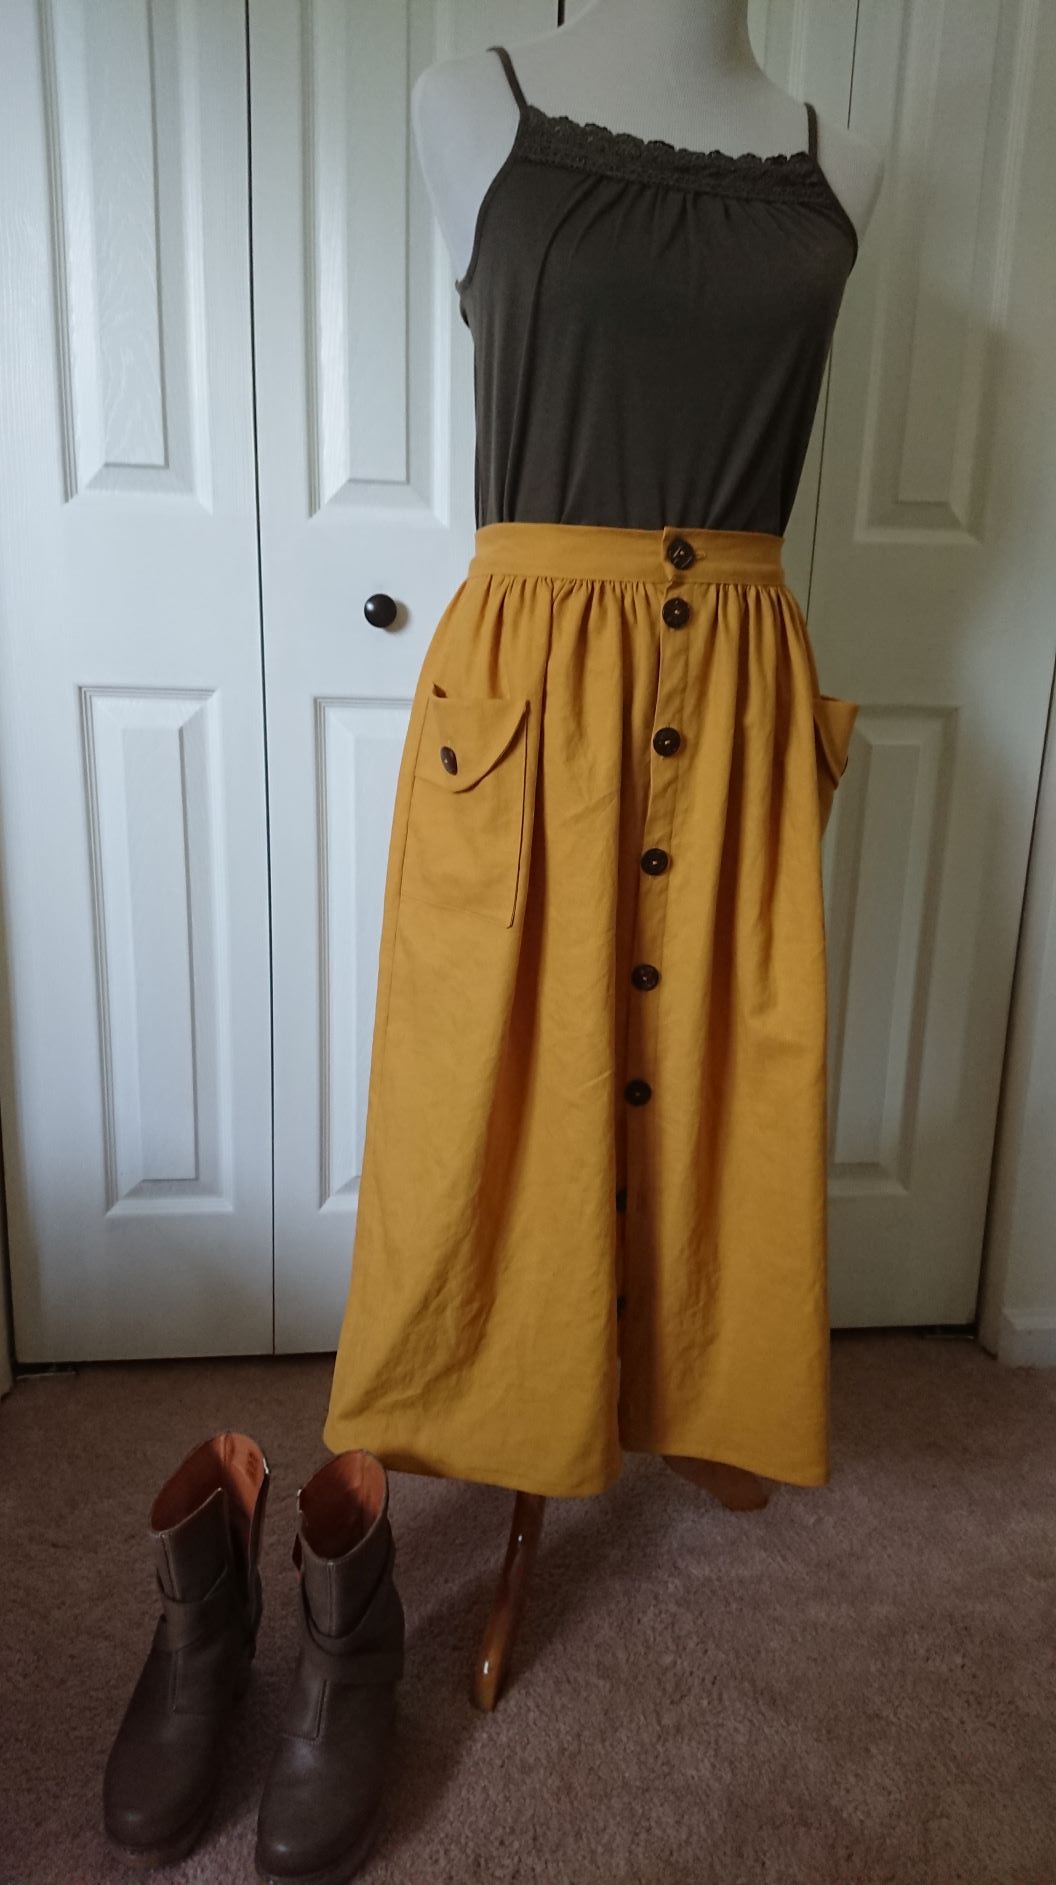
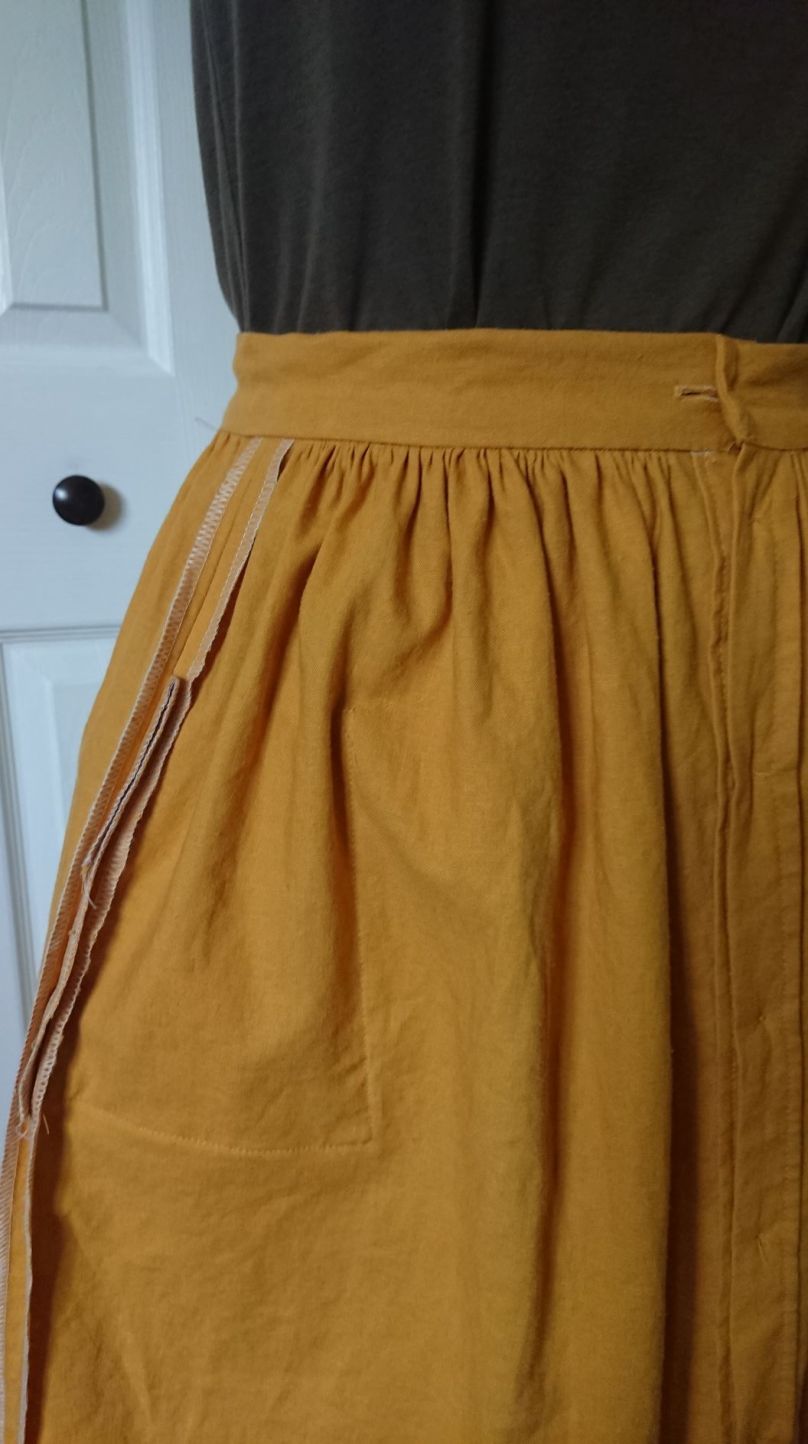
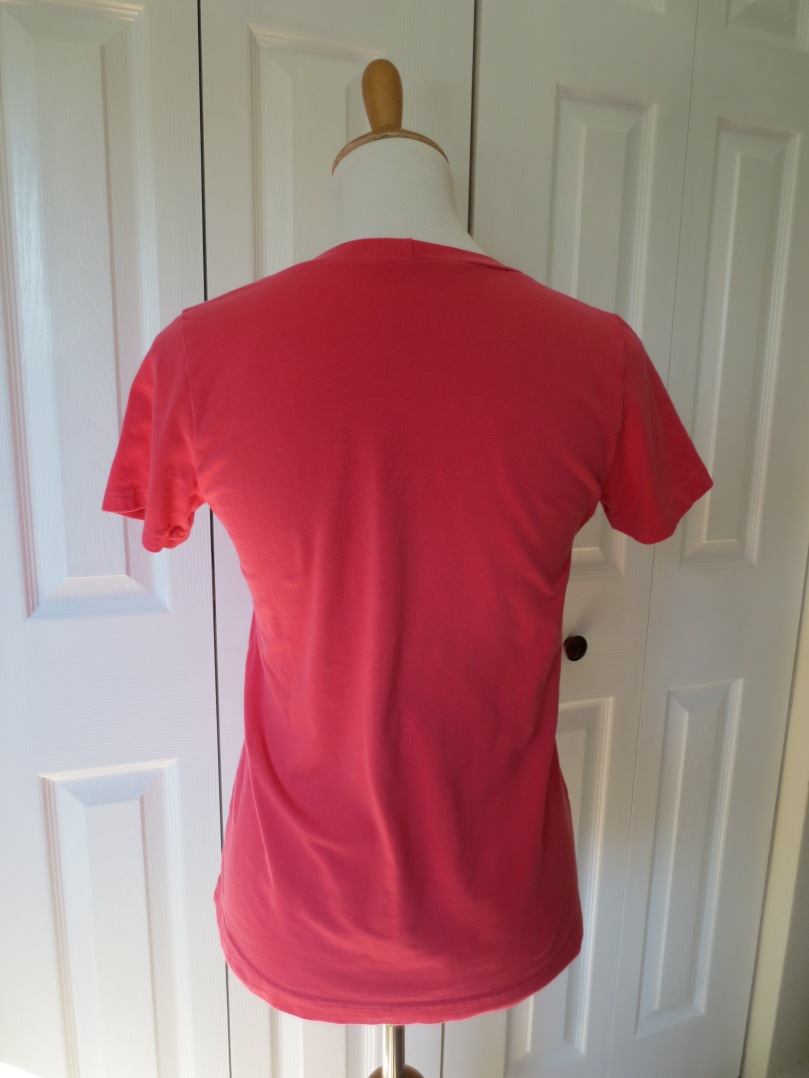
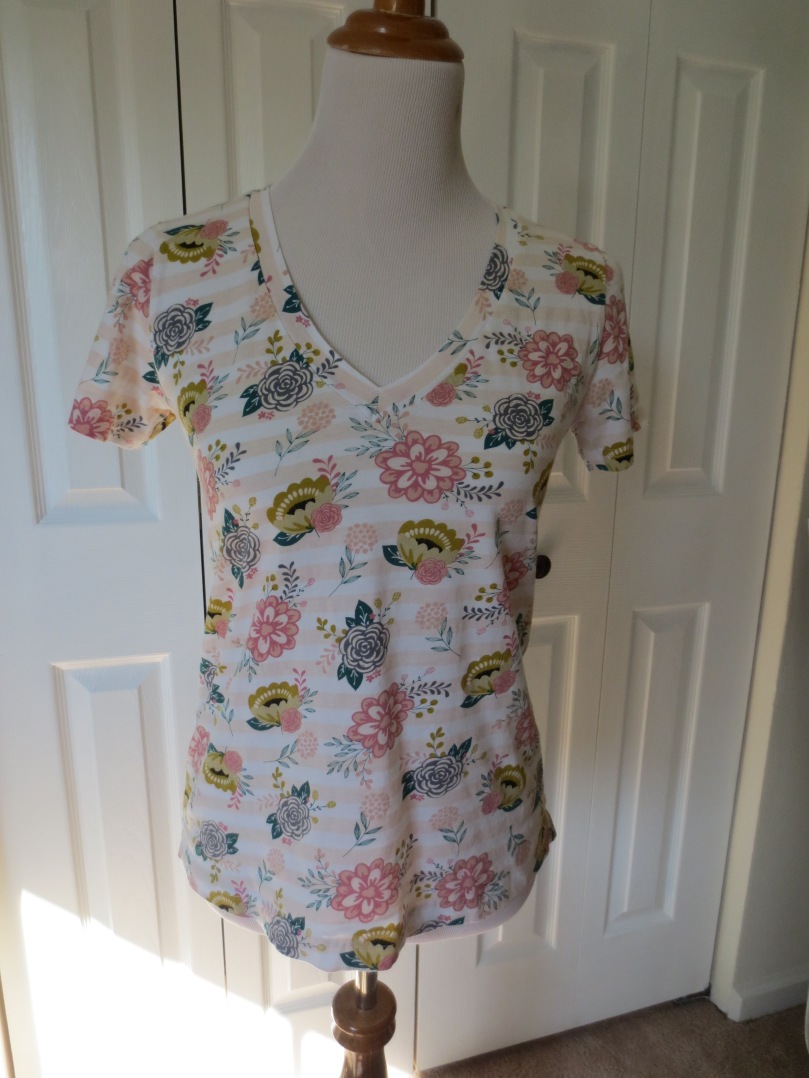
 My finished Aida on my dressmaker’s dummy, made with lovely
tencel twill from Blackbird Fabrics.

I wanted to figure out why that was the case. When I picked the patterns for those two blouses (the Willamette by Hey June and the Aida Top by Sew Liberated), it was because I loved the design elements and I knew that those pattern companies were reliable in their drafting and instructions. As I expected, the tops came together beautifully and looked good on my dressmaker’s dummy. Then I put them on, took photos for my mom and best friend, and then left them in my sewing room. The Aida did get worn to work a couple of times, but when one of my students mistook it for a scrubs top, I got mildly depressed and back into the sewing room it went.

Part of me assumed that the tops were too long; I don’t usually shorten tops, especially now that cropped tops are back in style, even though I really should be taking 4″ out of my tops AND my bottoms (I’m 4’10”, the average draft is for a woman that is 5’6″-ish, so math = 8″ difference, distributed evenly between top and bottom). But when I put on the Willamette (view C), it actually shows skin at my waist when I raise my arms above my head – that makes it inappropriate for work wear, since I have to raise my arms to write on the whiteboards. So obviously, the tunic-length of the Aida and the cropped length of the Willamette showed that length, at least by itself, was not the issue.

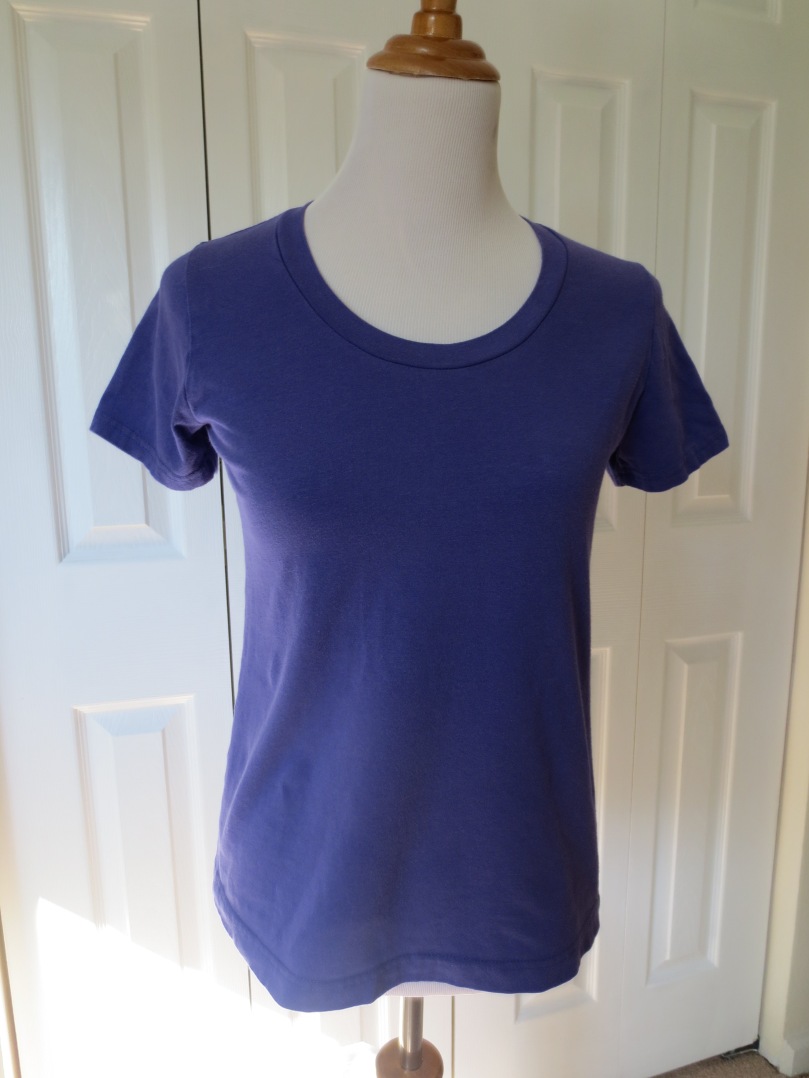
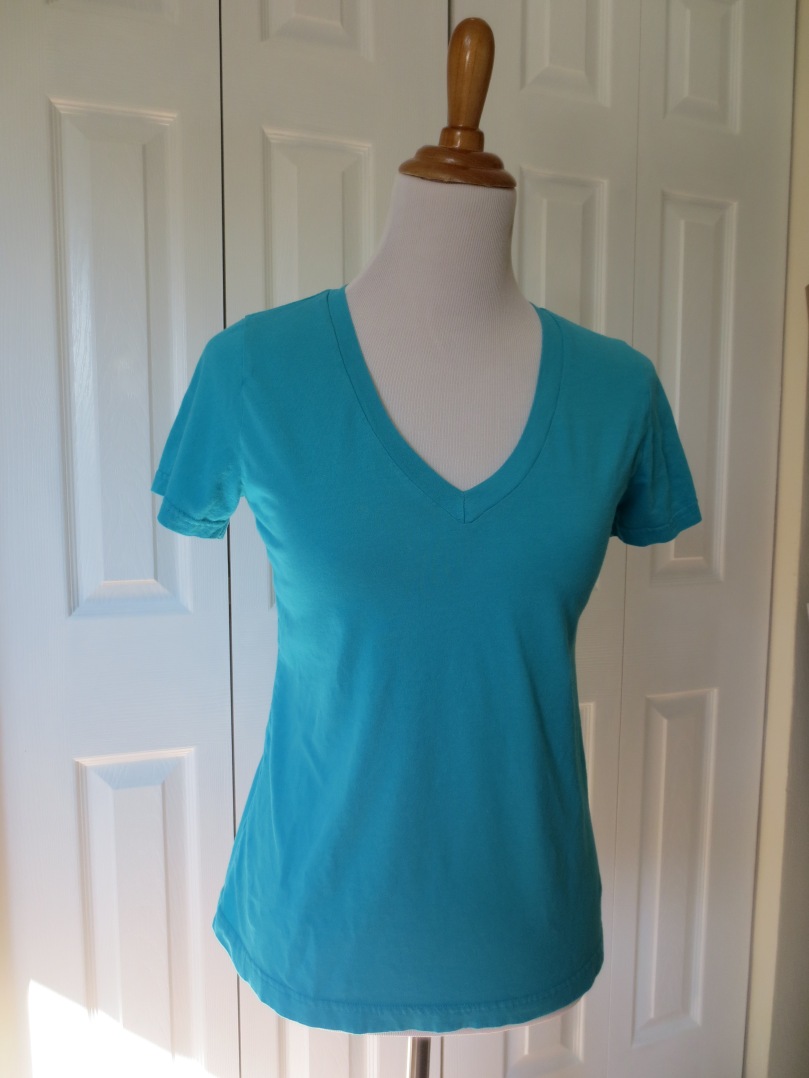
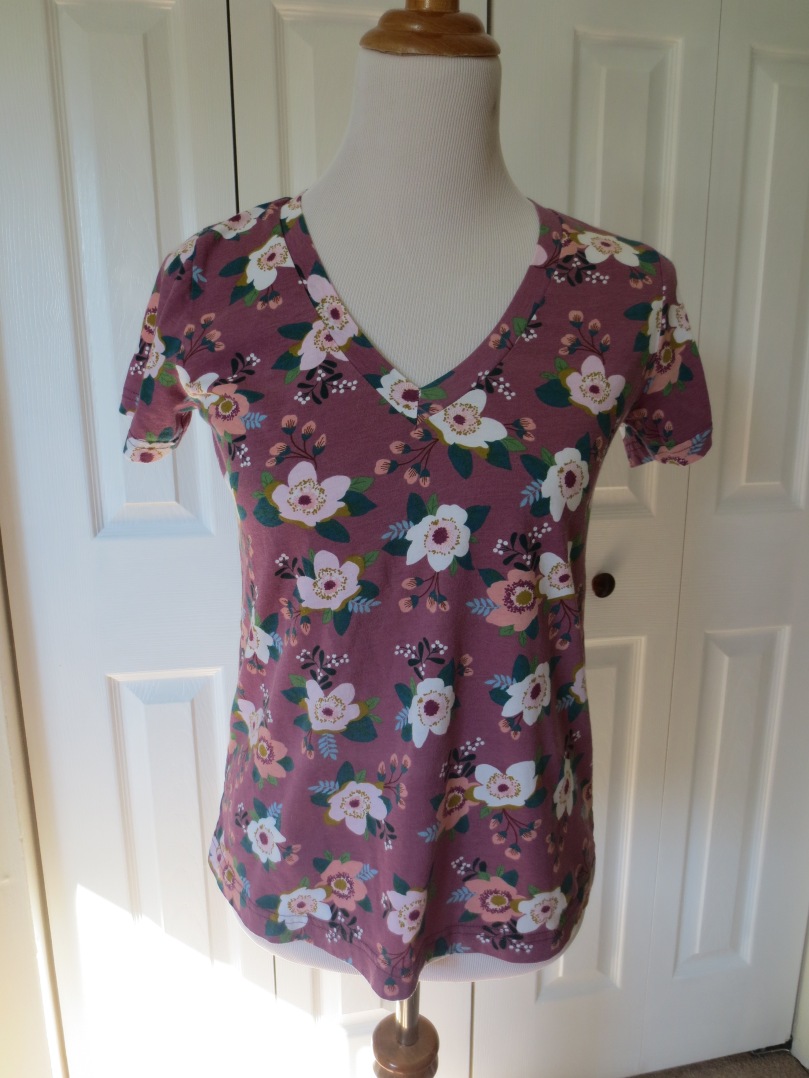
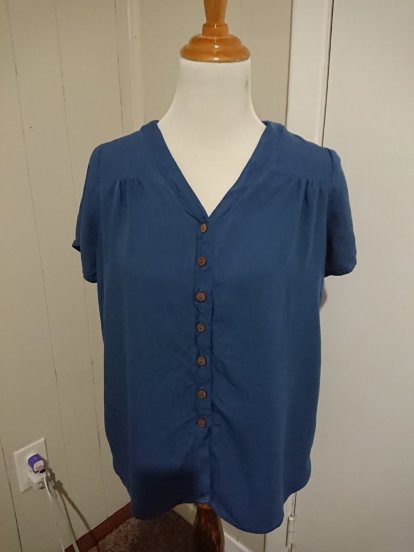
Then I considered why I felt uncomfortable – and unpretty – in those tops. And that’s when I had my “well, DUH” moment: as a woman with a big difference between my waist and hips, wearing tops with no waist definition makes me look hip-thick from my hips all the way up to my shoulders. And I have big hips, so that means I look big ALL OVER. Now, I have gained weight this year (my goal for 2020 is to be healthier, specifically eating better and actually working out a few times a week), but I do still have my hourglass figure. And the tops that I do wear show that I have that shape; my polos and t-shirts (all are the Hey June Union St., updated version) all fall under the heading of “semi-fitted,” which means that they are not skin-tight, but fit closer to the body than boxy, loose, or swing tops. Thus, I figured, I should really be making semi-fitted tops when I sew up wovens as well.

Anyone who has been sewing for any length of time and/or knows the basics of garment fitting knows that there are two primary ways to fit a top to curves: bust darts and/or princess seams. If you just take out width from the side seams, you will end up with a top that has odd flares at the bust and hip and is impossible to press so that the side seams lay flat (ask me how I know that). So, because I like to ignore the fact that I already own hundreds – yes, hundreds – of sewing patterns, I went to search the current offerings of the big 3-4-5…and found next to nothing. Across Butterick, McCalls, Vogue, Simplicity, and Simplicity’s sub-brand New Look, which is my personal favorite commercial pattern label, I found maybe 2 or 3 tops that could be considered semi-fitted wovens. So out of ~100 patterns, less than 5% would work.

I then went to Pattern Review to do a more comprehensive search of both current and out of print commercial patterns, as well as the indie companies. I did not get much better results; the vast majority of commercial patterns that resulted from the search term “princess seams” were dresses and coats, mostly from Vogue, and the only indie companies that regularly use princess seams in their patterns are Itch to Stitch, Cashmerette, and Sewaholic. Of those, Sewaholic was the only one that had multiple top options with princess seams, which makes me even more depressed that the company went stagnant after Tasia sold it.

My guesses for why there is such an extreme lack of semi-fitted woven patterns:

  1. Boxy, loose, unfitted tops have been in style for a couple of years, and
  2. Most pattern companies, both commercial and indie, are trying to cater towards newer seamstresses, which means simpler construction with fewer pattern pieces and fewer instructional steps.

I have never understood the perspective of starting simple; when I was in my teens and still considered myself a beginner-to-intermediate seamstress, I never cared whether a pattern had “difficult” parts or not. If I wanted to make it, I knew I could figure it out, even if I made a mistake or two and had to redo part or all of a project. As far as I knew, that was how I was supposed to learn; we never improve if we never challenge ourselves, after all. So I really hope that my first guess is the true explanation for why there is currently such a limited selection of semi-fitted woven top patterns on the market.

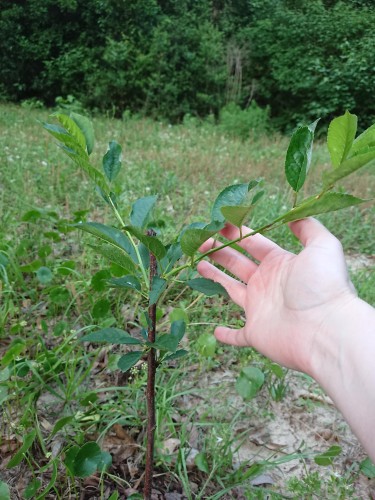
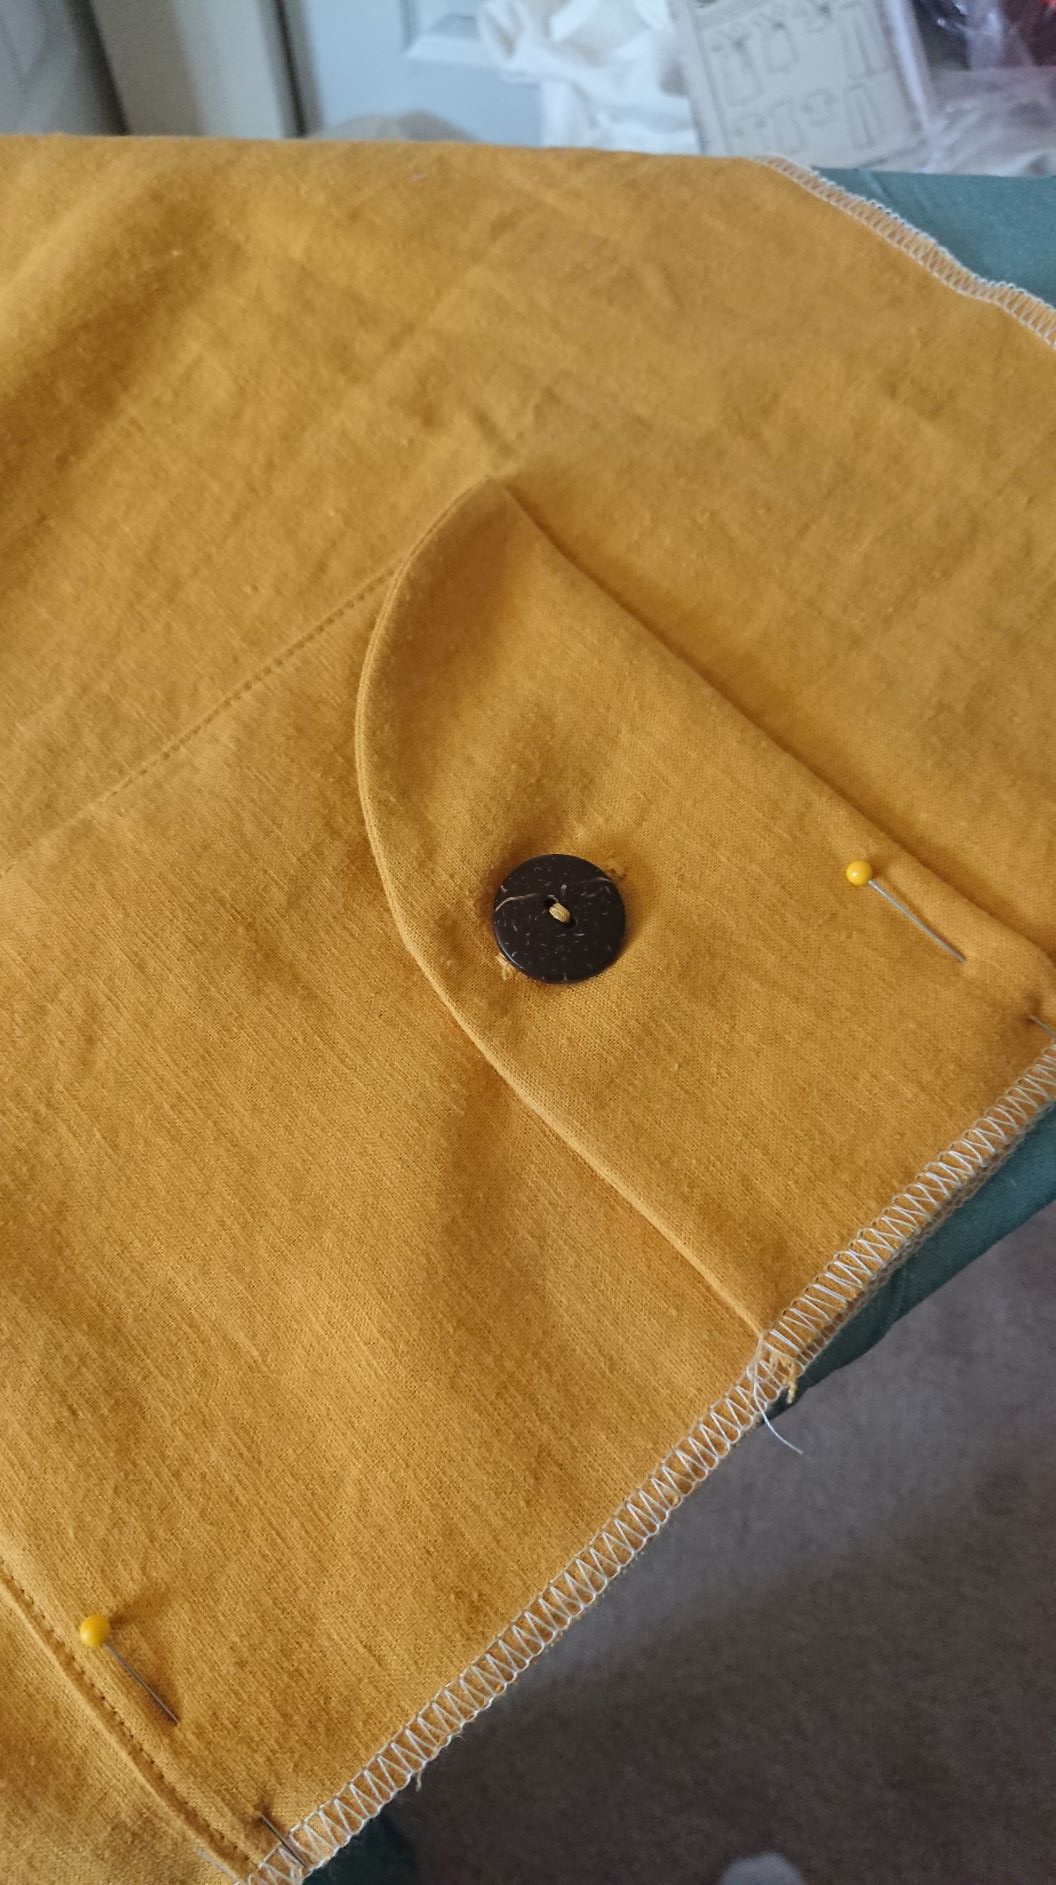
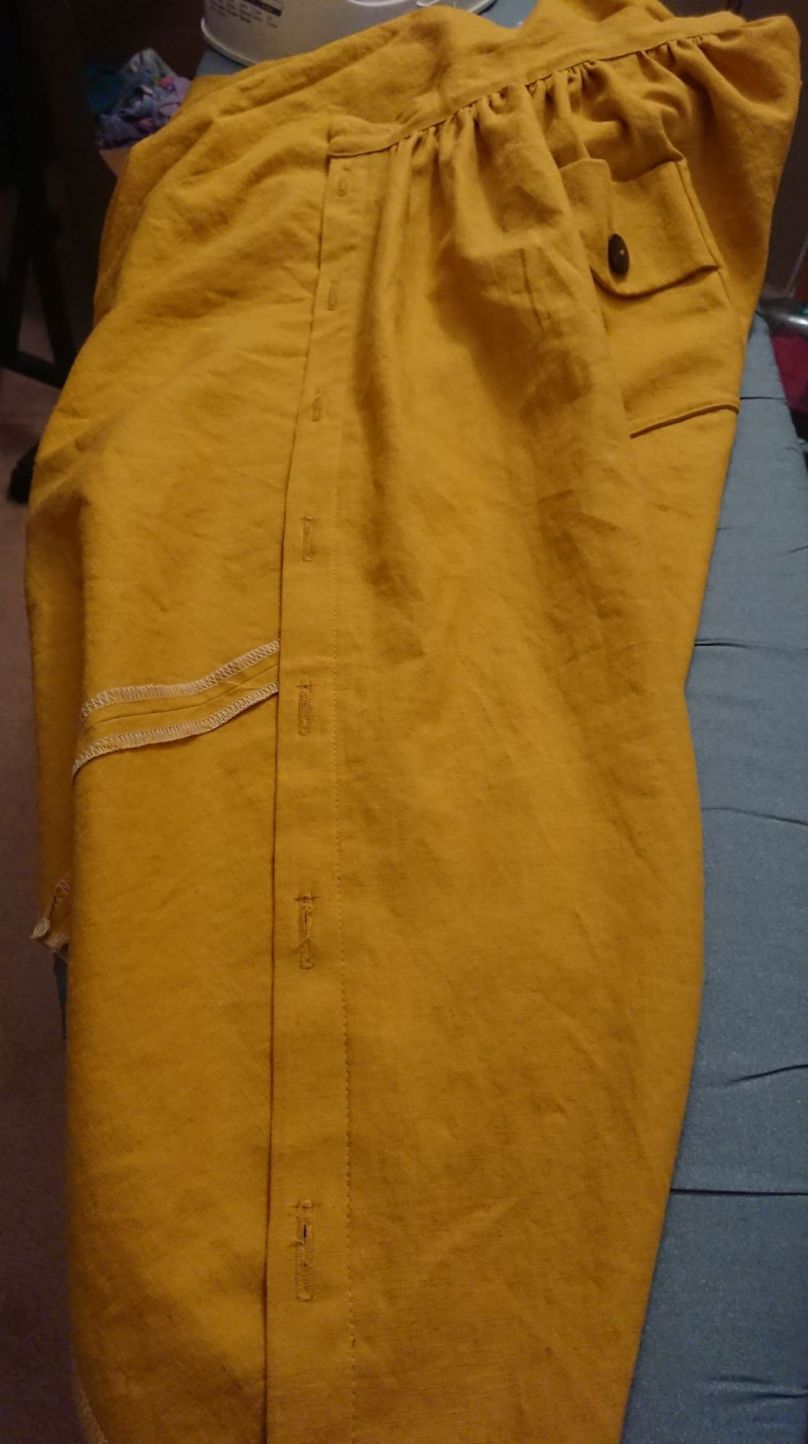
Now, as far as the two tops I already made, I did not want that lovely fabric to go to waste, so I needed to figure out how to alter them to make them semi-fitted. My first impulse was to ADD princess seams or fisheye darts from the bust to the hip in the front and either do the same in the back or add waist ties to the side seams to gather in the volume at the back. I took my Aida and put it on my dressform and did a rough pinning of the alterations to see how they would look. This was the result:

Aida with princess seams added

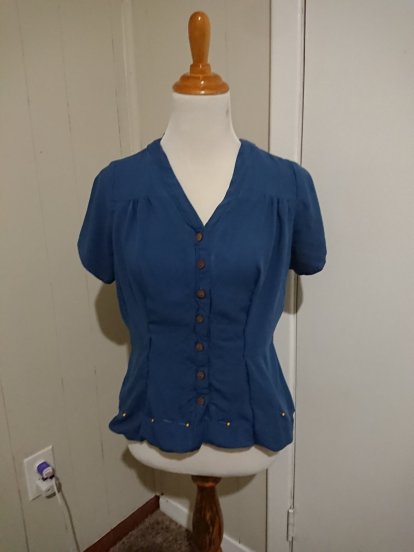
Keep in mind that the “seams/darts” and hem are puckered and puffy because this is just pinned in place rather than basted. But you get the idea – it is much more fitted and less loose/swingy, but still has that lovely shoulder gather detail and collarless placket that made me love the design in the first place. I don’t think I will hem it quite that short, but I have already basted the seams so that I can tweak them further.

The hunt for woven top patterns that already have princess seams also led me to New Look 6598. a pattern that I happen to already own. Joy! I also have 6407, which is similar, but the deeper/lower neckline makes it unsuitable for my work wardrobe. And I almost fell out of my chair when I saw that McCalls had just released the 8027, another button-down with princess seams AND an option for a laced-back detail. Happiness!

On one hand, I am glad that I was able to find a few options to work with. On the other, I am sad that there is such a dearth of semi-fitted woven top patterns currently available. BUT!! One of the major perks of sewing my own clothes is that I can adjust any design to include the details and fit adjustments that I would like to have, and that includes princess seams and darts. Yay for home sewing!

Julia

Text Bite: “Dated” Fashion

In my mind, there are two primary reasons for sewing my own clothes:

1. I can make things that actually fit my 4’10” self.

2. I can make whatever styles I feel like wearing, whenever I feel like wearing them.

Now, I can understand that there are plenty of seamstresses that would like to be “fashionable” and “on-trend” (I HATE that phrase), so it makes sense that there are plenty of patterns being released by both the big 3-4-5 and indie companies. But that shouldn’t and doesn’t mean that patterns that were released longer than 5 minutes ago are somehow out of fashion.

It has been stated by both industry insiders and fashion pundits that, for the last 20 years, there has not been a defining style as there was in previous decades. They generally cite the instant information age and the rapid production speeds associated with fast fashion as major contributors to this high-turnover fashion phenomenon. But the direct result is that just about every style and design feature has been in fashion at some point during the past 20 years.

Think about it – Low, Mid, and now High rise have all been popular in the last 20 years. Skinny seemed to dominate, but boot cut has always had its place; and flares made a comeback a couple of years ago, with cropped wide-leg being the trendy pants silhouette right now. Skirts have gone from mini to midi to maxi and back. Ruffles come and go. Statement sleeves are in, along with high rise acid washed “mom” jeans that everyone thought would stay in the 80s and early 90s. “Everything old is new again.”

And thus, I get simultaneously amused, annoyed, and frustrated when I see home seamstresses labeling any pattern as “dated.” Have they not realized that there is no such thing as a “dated” style anymore? And even if there were, I cite my second reason for sewing my own clothes: we – as seamstresses – have the power to make whatever we want to wear, whenever we want to wear it.

According to most fashion stylists (both professional and self-appointed online “influencers”), the main things to consider when choosing styles and silhouettes is that they suit your figure and make you feel confident and beautiful. Just because leggings-as-pants somehow became a trend, that does not mean that everyone of every shape and size would look good in them AND feel pretty in them. Options are always a good thing.

So, a year or two ago, when I was looking up patterns for wide-legged pants and tiered skirts (two of my favorite styles) on Pattern Review, I came across comments that declared those styles to be “dated.” I snorted. Saying that something is “dated” dates the speaker as someone who has lived longer during the times when decade trends dominated than in the digital information age. I expect those same people to try and enforce the “match your purse and shoes” and “no white after labor day” rules. Aren’t we past that crap yet?

To summarize – just because we aren’t seeing X style or Y silhouette on the catwalks does not make it dated. If something is directly tied to a particular decade (e.g., Poodle Skirts – 1950s, Leg-o-Mutton sleeved wedding dresses – 1980s), it is not “dated;” it is “period fashion,” and there are plenty of pattern companies and seamstresses who style themselves according to the fashion tenets of those periods, especially the 1950s.

So people shouldn’t go claiming that something is “dated” just because it was popular a year or two ago and we don’t see it in stores now. One of the main points of sewing for ourselves is so we are not held hostage by the high street. If you don’t like a silhouette because it’s not your style or doesn’t suit your body type, fine. But if you don’t like a style because the high street says you shouldn’t like it anymore, that’s a pretty sad-sack reason for a preference.

Julia

Doing God’s Work (Because God Likes Ice Cream)

During my brief 2-week break between the summer and fall semesters, I drove over to my parents’ house to see my family and celebrate my dad’s birthday. As I was getting ready to leave to come back home, my dad asked if I wanted to have his Cuisinart ice cream maker because it was “too small for what he wants to do” – everything he makes has to be in mass quantity, so a 1.5qt capacity ice cream maker is just a damn tease.

old school Cuisinart

This cute bucket-style model is no longer being made, but they have another model that functions in the same way – it just looks more like a food processor than “ye olde wooden ice bukket.” The one I acquired has 2 freezer bowl insert thingies, so you can make two batches in a row if you get on a major ice cream making kick.

I already had a little Hamilton Beach Half Pint single-serve ice cream maker that I used quite a bit during the summer when I lived in Japan, and I remember keeping a jug of my own pre-made ice cream base in the fridge at all times. Back then, I used a mix of 1 can of sweetened condensed milk (full fat) and 2 cups of half-and-half. And for some reason, I never tried any of the other cream types.

half pint

The Half Pint (which also comes in pink and blue) isn’t being manufactured by Hamilton Beach anymore, but you can still get them for about $20 on Ebay, which is how much they sold for when they were still being made. I would never buy one for the ridiculous prices that people are trying to sell them for on Amazon, but hey – maybe cute is worth it. I’m just glad I already own it.

So, since I brought the larger (for me) Cuisinart ice cream maker home, I have been experimenting to see what the differences are between ice cream made with heavy whipping cream, whipping cream, and half-and-half, besides just calories. My first batch of ice cream used heavy cream because it’s what I had on hand. My second used whipping cream, and the batch I literally just made used half-and-half. All products were the Kroger store brand, so there wasn’t a variance between brands, just the amount of milkfat per cup.

The ice cream base I used for all three batches was:
– 1 (14oz) can of sweetened condensed milk (full fat), Kroger brand
– 2c cream
– Flavoring(s) of choice

So, approximately three ingredients total per batch. I would whisk the condensed milk into the cream along with the flavoring, then get the freezer bowl out of the fridge and pour the ice cream base into it, set up the ice cream maker, and start it up. I ran the first batch (heavy cream) for 20 minutes, and the second and third (whipping cream and half-and-half) for 25 minutes.

First batch (heavy cream) was plain chocolate flavor (added 1/2c of Hershey’s cocoa powder) and because it was made from heavy cream, it was the consistency and texture of gelato. It was soft-serve consistency at 20min, but after being in the freezer it became a lot firmer. This ice cream really tasted like cream, and although I hate using the word “rich” to describe food, that’s how most people would characterize this type of ice cream. Definitely the real deal.

Second batch (whipping cream) was chocolate peanut butter swirl (added 1/3c Hershey’s cocoa powder to the base, then added layers of 1/2c melted peanut butter as I scooped the finished ice cream into the container to put in the freezer), and it was just as good – if not better – than the Haagen Dazs and Turkey Hill chocolate peanut butter swirl ice creams I usually get at the grocery store. It reminded me of the ice cream my dad and I used to get at the little old-fashioned ice cream shop in Rehoboth beach. This ice cream was lighter and less creamy in taste and texture than the heavy cream batch. This was in line with what I expect regular ice cream to taste like.

Third batch (half-and-half) was mint chocolate chip (1.5 tsp peppermint extract and 1/2c mini semisweet chips) and it was still not truly frozen after 25min; it was too runny to be considered soft-serve, so I put it into another container and stuck it in the freezer. After a bit, I took it out and it was then at soft-serve consistency. The taste is a lot more milky and less creamy than the other two batches – definitely more “ice” than “cream.” The texture is also grainy, which was not present in the previous two batches. I certainly won’t have a problem eating this, because it does taste good (enough), but it’s gone a bit past ice cream and into “frozen dairy dessert” territory.

CONCLUSIONS – Ice cream made with heavy whipping cream is ridiculously good, but should be reserved for special occasions because it’s fatty-fat-fat and pretty intensely creamy. Ice cream made with plain whipping cream is a good “everyday” ice cream, lower on the fat scale, but still definitely ice cream. Ice cream made with half-and-half is when you want something that is an approximation of ice cream, but isn’t going to blow up your calories for the day.

After I finish using up the half-and-half that I bought, I’m going to probably stick with whipping cream for my weekly ice cream making sessions. But I’ll pick up some heavy cream if I’m feelin’ fancy and fatty.

NOTES ON FLAVORING –  1/2c cocoa powder (I used Hershey’s Cocoa Powder, the regular kind, NOT the special dark) was VERY intensely chocolate. It was good as a plain chocolate ice cream, but I wanted it a bit more mellow when combined with peanut butter swirl, which is why I reduced the amount to 1/3c for the second batch.

In my third batch, I wish I had put it a bit more (maybe 2tsp instead of 1.5) peppermint extract and a bit fewer (maybe 1/3c  instead of 1/2c) mini chips. The chips, which are Enjoy Life Semi-Sweet Mini Chips, are outstanding; I just want a bit fewer chips per bite of mint ice cream. Of note, I’m also the type to reduce the amount of chocolate chips called for in a chocolate chip cookie recipe, so there’s that. I like my chocolate, but if I’m going to eat it in something else, I want to be able to taste that something else, too. 😉

Julia

The Ravelry Spin-Up

Since everyone who has ever had anything to do with Ravelry is resurrecting blogs or putting out Tweets, posts, vlogs, or for all I know, posting signs on the telephone poles in their neighborhoods, I figured I should go ahead and say my piece.

First, my disclaimer: I am a loud and proud Libertarian. I voted for Gary Johnson (weed for everyone!) and did not actively support Trump prior to his election. However, as a member of the military, I do support my presidents while they are in office, regardless of whether I voted for them or not.

The thing that has me most distressed about the responses to the Ravelry policy change is the rampant ignorance on all sides. People will make judgment calls based on little or no actual evidence – NOT FEELINGS – and then call out people who disagree with them in a horrendously offensive way. That is, effectively, what Ravelry did with their policy, and that is the response that has been elicited from both supporters and detractors.

I am a college English professor. I am frequently confronted with these kinds of “arguments” from my students when we are discussing texts. I say, “what did you think about the text you read for today?” and I get responses like, “I hated it! It was boring!” Or “I liked it! It was funny!” and my response to both the positive and the negative is always “Ok, WHY do you think that?”

An answer to that question that does not include direct evidence from the text is NOT A VALID ANSWER. As heartless as it sounds, I don’t care about my students’ feelings about a text unless they can validate them with evidence from the text. This proves not only that they read the text, but that they understood what it was about and can place the text within the larger context of their own experiences.

This is the type of answer I love to hear: “I disliked the second text because on page 2, in paragraph 5, the author directly contradicts a statement than he made on page 1, in paragraph 4, and that leads me to question the honesty of the entire text.” That is a negative opinion that is clearly based on solid evidence rather than just feelings or ungrounded impressions.

I recently saw this comment in response to one of the many blog posts about the Ravelry policy change:

“I agree with Ravelry. Trump needs to see that his actions affect all kinds of people. He believes that he has the right to say whatever he wants without considering the result. We should all be able to take a stand for our beliefs without backlash from those who do not agree. This is called freedom of speech. It scares me that we are starting to lose this valuable right.”

Let me dissect this comment as an example of faulty argument.

First sentence – ok, good lead-off. I appreciate you stating your opinion up front. Second sentence – I’m not sure how a policy on a fiberarts website shows Trump anything; I wasn’t aware that he was an active Ravelry user. Third sentence – again, I don’t recall Trump being an active user of Ravelry, but I would be happy to see proof to the contrary, so this policy is NOT directed at Trump. Sentence four – here is when the author of this comment becomes self-contradictory; if we should all be able to take a stand for our beliefs without backlash from those who do not agree, then HOW does the Ravelry policy banning open support for Trump PROTECT this? It actively goes AGAINST this statement the author of this comment has made. Sentence five and six – this author further discredits their own argument by pointing out that they are frightened at the loss of freedom of speech, and yet they support/agree with Ravelry’s policy, which is blatant censorship.

This opinion is self-contradictory. It has no direct factual support. I have seen other comments that say that they support Ravelry because “Trump is a nasty person” – ok, what exactly does that MEAN in practice? What specifically has Trump done TO YOU that you disagree with? I have seen claims of attacks on women’s rights that are not backed with any sort of proof or evidence, and even the Ravelry claim that Trump openly supports white supremacy cannot be directly supported with solid evidence. It is all hearsay.

Because I want to show both sides, here is another comment:

“I will no longer be using Ravelry based on their decision! I am an avid knitter but they have no business in politics. I find the liberal left in this country to be the largest group of hypocrites and the most inhumane group ever! They are constantly undermining everything good thing that this administration tries to do. Bye Bye Ravelry”

First sentence – again, glad to see the initial viewpoint up front. Second sentence – there have always been political posts, discussions, and patterns on Ravelry. Stating that politics does not belong in [insert forum, hobby, group here] is an opinion, not a fact. Third sentence – this is just as big of a sweeping group defamation as the Ravelry claim that all support for Trump is direct support for white supremacy. Fourth sentence – again, show me the evidence. What good things specifically? How did the liberal left undermine them specifically? I’m not saying the evidence doesn’t exist – I’m saying it doesn’t exist in this comment, which leaves the opinions of the comment unsupported.

Ultimately, I have chosen to close my own ten-year-old account on Ravelry because I cannot support blatant censorship of those with whom you disagree. I understand that they have the right to make that call and I respect that right; I also understand that I, as a consumer, have the right to take my business elsewhere if I disagree with how they exercise their rights.

I also spent considerable time looking for evidence to support their claim that Trump is a white supremacist, and I did the same with the claim that Obama was a Muslim. Both times I came up empty. These are – to use one of my students’ vocabulary words – attempts to VILIFY those with whom you disagree or those whom you do not support.

People need to be aware, now more than ever, that if something is not supportable by actual evidence, it is NOT TRUE. It does not matter how often news outlets report on it, nor how many news outlets report on it, nor what side those news outlets are on, nor how much money they bring in each fiscal quarter. If the statement cannot be supported by facts, it is NOT TRUE. Do not look for the statements – look for the supporting evidence.

Here is an example that I use in all of my classes on validating sources: How many of you have heard the “statistic” that your mattress “doubles in weight” after 7 years, due to mites, sweat, dead skin cells, and other nasty-nasty things? Do you know where that “statistic” came from? A young “journalist” wrote that into an opinion piece because she thought it sounded good. It was not based on any sort of scientific study. The original author literally MADE IT UP. And yet, because people blindly trust anyone who publishes articles under the header of a news outlet, it was believed. And it was not only believed, it was assumed that it was backed up by scientific fact. From there, mattress and furniture companies began incorporating the “statistic” into their advertising materials, again without validating the claim and looking for supporting evidence. So a claim is now viewed as fact because enough people have repeated it without checking to see if it is actually supported by verifiable scientific evidence.

That is frightening.

What I want people to know about the Great Ravelry Spin-Up is not anything about tolerance, free speech, hate speech (which, I would like to point out, comes from both Trump supporters AND Trump vilifiers, as well as people who don’t give a damn about Trump either way), or censorship. I want people to understand that just because someone – even someone you think you trust as an authority – makes a claim, that does NOT MAKE IT TRUE. It must be supported by evidence, regardless of whether the person making the claim is the most trustworthy person you know. If a claim cannot be supported by evidence and fact, it is groundless.

And making important decisions based on groundless claims is a dangerous thing to do, no matter the context.

Julia

First Fabric Purchase(s) in the New House

I suppose I should be feeling guilty after moving like 10 huge plastic bins of fabric into this house after I bought it. But nope. I can rationalize it thus:

  1. I had yet to buy anything from the esteemed ladies of Blackbird Fabrics, and I love supporting small businesses.
  2.  This was my first time visiting the new location of the Joann of my childhood, so I had to show them some love, cash-money style.

So! Photos and plans! Here we go.

Blackbird Fabrics cuts:

dsc_0069

I got 1 yard of this awesome swim fabric because I really do need another one-piece. I gifted my first swimsuit make to my best friend, so I must replace it. This will be a Megan Nielsen Cottesloe, view A. I was one of the testers for the pattern and I made the view A before they added the ties; I think the ties are a cute addition, so I will be making them.

dsc_0066

I have been lusting after rayon (viscose) twill ever since people started sewing with it all over the blogosphere, and I finally got some! In three colors! Because go big or go home. This blue cut is going to be a Sew Liberated Aida top, which will be awesome for work.

dsc_0068

This olive drab (“Marine green” to me) is a color that I haven’t worn much lately, but I always got compliments in the past when I wore tops in this shade, so I figured I’d go for it. This will be a Hey June Willamette, view A. Another good work shirt.

dsc_0067

Another color I don’t usually wear, but I know it will work with my skin/hair/eye tones. I think this will become a Hey June Biscayne. I’ve made a couple of Biscaynes – one that didn’t look right because the fabric didn’t have enough drape, and one that I hate because it’s horrid poly charmeuse in a color that looks awful on me, which had been in my stash for years.

I consider both of those muslins, though; the first was made exactly to the pattern and was too big in the upper chest (I’ve mentioned previously that I need to do a short upper bust adjustment on most tops, and I need to do a slight one on the Biscayne), and I made a TON of unnecessary adjustments for the poly charmeuse version (shortened the top in the waist, shortened the placket), which just made things worse.

This time, I will do what I should have done in the first place – I will grade out at the hips by one size, and do a 1/2″ short upper bust adjustment.

Joann Fabrics cuts:

dsc_0063

I used to hate the mere idea of wearing yellow, but in the last couple of years it has really started to grow on me. When I walked past the spring apparel fabrics display, this cotton double-gauze leaped out and pinched my arm, so I had to get some. I bought the amount required for a Biscayne, but I might make something else. Probably the new Hey June Lucerne, view B. Having a top in a floral fabric with petal sleeves is an awesome sewing pun. =)

dsc_0065

I am annoyed with Joann for classifying all of their cute printed cotton/spandex knits as “juvenile apparel” fabric. Why the heck do the kids get all the fun stuff? I don’t care – I bought this for ME, dammit! It’s going to be the awesome Hey June Union St. tee, with the v-neck. And scraps will become a pair or two of undies from my TNT Kwik Sew pattern. BTW, I am ACEING Me-Made-May; I wear something me-made everyday because at this point, all of my underwear is handmade. Winning without trying! 😉

dsc_0064

Another “juvenile apparel” cotton/spandex knit that I have appropriated for adult clothing purposes. I love mod-pop florals, which is funny because I don’t really like mod style in any other application. I guess I just love flowers in any form. This will be another Union St. and undies. Maybe I’ll finally get around to making some bralettes, too.

dsc_0053 dsc_0062

Speaking of flowers, here are the two hibiscus bushes that I planted a month or so ago. The one on the right is, I think, a tropical hybrid rather than a hardy variety, as it suffered quite badly from low water and dropped most of its leaves right after I planted it. Meanwhile, the one on the left was happy as a clam with whatever water it happened to get. Either way, they are now thriving and covered with buds. I think I’ll try cutting the blooms off after a few days and drying them to make tea. I LOVE hibiscus teas!

Now to go print, tape, and cut some patterns.

– Julia

Weekly Planting Update

I recently moved to a new-old house with its private lawn/yard/forest/wilderness of 4.5 acres. As the lucky recipient of green thumb genes from both sides of my family (my brother once killed a cactus, so I am pretty sure I got all of it), I have readily become obsessed with gardening. So that I wouldn’t overwhelm myself by trying to do everything all at once, I decided to dedicate this year to planting long-term growers (i.e., trees and shrubs) and sorting out where I want to put things like fencing, raised beds, and any other stuff that needs to be built.

The official move-in happened at the beginning of March, and I planted the 11 fruit trees, 2 blackberry canes, and 4 blueberry bushes I bought from the Ty Ty Nursery about a month later. Ever since, I’ve taken to doing a weekly walk-around where I check to see how everything is progressing and update my grandma (the family’s Master Gardener) on my budding (HAHA!) orchard. I figured that I’d go ahead and start putting my weekly photo record on here so that I can go back and look at it later. Maybe.

Note – I bought all of the plants/saplings from Ty Ty as bareroot plants and planted them all using a post hole digger.

dsc_0012

I have always loved gardenias, so I planted 3 August Beauty bushes, bought at the local Lowe’s, around my front porch. And here’s my first bloom! Eeee!

dsc_0013

While doing my own planting, I am also working to identify the many varieties of weeds that crop (HAHA!) up around my property. This one looks like an herb, but I have no idea what it actually is.

dsc_0014

I planted 3 PawPaw saplings, and this one is doing the best. One other has some tiny leaves after about a month of no progress, and the third one still looks like a stick. But since the second one waited so long to do anything, I have high hopes that the third one will eventually start putting out leaves as well.

dsc_0015

I planted two varieties each of plums and cherries. This is my Blue Damson, which started putting out leaves pretty soon after I stuck it in the ground.

dsc_0016

This is a Stanley plum. I’m really looking forward to seeing these guys put out blooms. And not just because blooms become fruit; I think plum blossoms are lovely, too.

dsc_0018

My Montmorency cherry had an interloper, which my camera did not want to focus on. I’m pretty sure it’s a giant leopard moth caterpillar. I saw a few of these in my backyard when I lived in Virginia Beach. This one got relocated to a patch of weeds a few yards away.

dsc_0019

Dollar weed is all over the damn place this time of year, and this specimen impressed me with its size (that’s what she said). Soon all of these suckers will be gone, because I just bought two bags of Scotts triple action southern variety to take out these AND all the damn ants that keep relocating every time I oust them. Little bastards.

dsc_0020 dsc_0021

My two thornless Navajo blackberry canes had several flowers on them when I did my last walk-around. Now they are busily turning themselves into berries. Woohoo! Hopefully I’ll get to them before the wildlife does.

dsc_0022

My second cherry, a Dwarf North Star. Both cherry varieties I bought are tart – or pie – types. I’ll probably put in a couple of sweet varieties next year. These are self-pollenating, but they put out more (that’s what she said) when planted near other tart types.

dsc_0025

Something had been noshing on my crabapple tree. Likely another moth ‘pillar. It also got relocated, but I wasn’t able to get a very good picture of it. I also cannot remember what variety of crabapple this is; I got it specifically because crabapples are good pollenators for regular apple varieties and I have a Honeycrisp sapling nearby.

dsc_0026

…aaaand here it is. I like to say that I planted this so my brother will come visit, but I like Honeycrisps, too. Eventually I’ll put in a Granny Smith or another tart apple variety. What can I say – I’m a fan of fruit that bites back. =)

dsc_0027 dsc_0028

Lastly, I went to check on my two pomegranates that are at the back of the yard. These guys are covered with pretty leaves, and I already love how they look. I’ve never eaten a pomegranate, although I love the juice. I’m anticipating the fun of eating the fruit once these get big enough to produce.

I didn’t take photos of my blueberry bushes because they are very leggy and unimpressive at this point. It amuses me that I had no problem making “THE CUT” on all of my baby trees (as described in “Grow a Little Fruit Tree” by Ann Ralph), but I am afraid to cut those darn blueberry bushes back because I don’t want to kill them. I really need to just do it. If I kill them, I can buy more.

As a final note – I felt so good after doing this walkthrough that I came inside and ordered myself two new orchid varieties to add to my collection. I think I have a plant problem. But really, growing things is pretty addictive, especially if you are blessed with a gift for it. =)

– Julia

Summer Smoothie Studies

It seems like every other summer or so, I get on a major smoothie-making kick. And that is just enough time between kicks to lose all of my recipes and tips, ARGH! But! Since I have a blog specifically for the purpose of stashing all of those wonderful bits of maker information that I would otherwise forget, I decided to write up a post to remind future me of what I have learned this go-round.

The One [Smoothie] Rule That Must Not Broken:

Never, ever, ever combine dairy milks with citrus!

Citrus (or any other acidic substance, such as vinegar) will curdle the milk and make it what modern cooks refer to as “buttermilk,” which is used in plenty of baking recipes but is pretty damn nasty in smoothies. It’s especially gross if you are not expecting it. You are now informed. Do not break the one smoothie rule!

Tips for Smoothie Perfection:

The golden ratio for the average countertop blender is 1c liquid to 1.5c solids. A decent blender (I use a Cuisinart 8speed that is like 12 years old. First kitchen appliance I ever bought!) can handle this like a champ, with no additional stirring or finagling.

For a thicker smoothie, particularly milk-based, I use 1c milk to 2c frozen fruit. This gives me a thick, creamy smoothie, but requires me to do a bit of blender dancing to get it all incorporated. I like to tilt the blender towards me while holding the pitcher onto the base until the blades are able to more easily move the ingredients and I can see the “funnel” appear in the middle. Then a bit of shaking or stirring (with the blender OFF!) using a long spoon, and after a bit the mixture will be smooth enough that the blender can do its thing with no more assistance.

A decent blender needs the liquid added to the pitcher first, so that the blades are able to move smoothly and process the solids effectively. If you add the solids first, the blades will just stir things around or get stuck. This is obviously not relevant if you have a commercial-grade blender, so if your kitchen is pimped then do whatever works.

DO NOT USE ICE. Ice is water, therefore adding it to smoothies will make them watery. Basic science. Freeze your fruit, even if you bought it fresh. Not only is frozen fruit just as healthy as fresh fruit, it creates a cold, thick smoothie without making it watery. It’s also fine to mix frozen and fresh fruit, but at least 1c of the fruit should be frozen so that the smoothie is actually smoothie-ish.

For extra creamy consistency, add in 1/2c of yogurt or 1/4c of peanut butter. Unlike milk, yogurt CAN be added to citrus-based smoothies without resulting in a funky flavor, so knock yourself out if you want an orange creamsicle smoothie. You don’t need to adjust the golden ratio – just add the yogurt or peanut butter in addition to your liquid and solid.

Basic Smoothie Recipes

pexels-photo-775031

Strawberry Banana (my version of the “Angel Food” from Smoothie King)

1c whole milk

1.5c frozen strawberries

1/2c frozen banana, sliced

1-2tsp Truvia sweetener

This is a thicker smoothie that requires the countertop blender dance to get it to fully incorporate, but is totally worth the [minimal] effort. Makes around 24oz.


Cherry Limeade

1/4c lime juice

3/4c water

1/2c pineapple chunks

1c frozen cherries

This combination is pretty tart, so swap the pineapple for another 1/2c frozen cherries if you prefer a more mellow cherry limeade. Or you can always put in a tsp or so of Truvia if that’s your thing. My blender handled this with no issues; it was thinner than the Strawberry Banana without being runny.

I have a few more potential smoothie combos in the back of my head which I will certainly have time to test out before the summer ends. Peanut butter banana is sounding pretty good right now, as is chocolate cherry. If I come up with anything stellar, I’ll make another smoothie post for future me. =)

Julia


P.S. The photos on this post are from Pexels.com, as I hate taking photos and can’t be arsed to take decent ones when there are plenty of freeware images for me to use. Especially since a smoothie is a smoothie, ya know?


Sewing Through the Blehs – Justine Skirt

Well, so much for my proclamation that I wanted to start blogging once a week. But it’s kind of hard to muster the motivation to work on anything when life circumstances have got you down, right? As a lucky recipient of genetically inherited clinical depression, I know all too well what THAT feels like. Fortunately, the blehs I’ve had lately are entirely natural – I’ve been job-hunting and had two in-person interviews that required extensive travel and did not result in job offers. Total bleh.

There are a couple of tricks I’ve developed over the years in order to make as least some slow and steady progress on sewing projects when I’m on the downside, though:

  1. Work on a project that would normally get me excited; something using a luxurious fabric or colors that make me happy. I don’t even bother trying to sew utilitarian garments because that will feel even more like a chore I will just want to avoid. If I actually feel like sewing something, THAT is what I sew.
  2. Do just one thing. Usually that one thing will end up leading to a bit more, and a bit more. My typical “one thing” is to thread my machines with the thread for my next project. It takes just a minute or two to run that thread through my serger and sewing machine, but it gets me in my workroom and working with the machines. I’ve found that often I will finish the threading and think “well, I’ll just finish prepping the pattern”…and then “well, I might as well cut the pieces out”…and so it goes.

As a result of applying both of these tactics, I actually did finish something and it makes me SO FRICKIN’ HAPPY to look at it so I’ve left it on my dressform. It is the Justine skirt, a free pattern from Ready to Sew. I have a serious seamstress crush on button-front skirts this year, and I loved the style of the pockets on the Justine. Not only are they cute, they are great for showcasing buttons. As soon as I saw the style, I imagined it in an ochre linen with dark brown buttons – the same color combination as a big, cheerful roadside patch of wild Black-Eyed Susans.

photo_7932

Not only have I been fixated on button-front skirts, I have also been inexplicably drawn to deep gold colors. Normally I shy away from colors on the warm side of the spectrum, as I prefer blues, purples, and greens to bring out my dark blue eyes. But it’s like I broke some sort of color barrier by choosing coral as one of my summer wardrobe colors and now I just cannot get this golden yellow out of my head!

Finished skirt.JPG

The fabric I used is a rayon linen blend from my local Joann. It washes, dries (tumble, low heat), and irons beautifully and was easy to sew; not nearly as wiggly as some other rayons and linens I’ve used.

As patterns go, this one is fairly straightforward: rectangles for the fronts, a rectangle for the back, rectangle for the waistband, and a curved-top pocket patch. There are multiple files included in the download and it was a big confusing to sort out which one to use. I also had an issue with some of the lines for the skirt panels being wonky and misaligned, so I had to true them before I cut out the pieces. Again, not a big issue because this pattern is mostly rectangles. It does make me wonder if the Ready to Sew paid-for patterns have this same issue, though.

Pattern truing

It’s hard to say whether my favorite detail is the front placket or the fold-flap pockets – they are both awesome and surprisingly simple to sew. Because the pocket flap is purely decorative, it’s as easy as any other patch pocket; plus, the pattern has you sew two pieces together and turn so that all of the raw edges are encased. It results in a very clean end look.

Pocket.jpg

The button placket is interfaced and folded twice to the wrong side. Part of me wanted to skip the interfacing, but I forced myself to do things exactly as called for in the pattern. It did strike me as odd that while the button placket is interfaced, the waistband is not. Again, I thought about deviating and interfacing it, but no! I behaved myself and stuck with the instructions.

Placket

Aside from the fact that this is linen and you can never press linen too much, I really wanted that placket to be crisp so I pressed the heck out of it between each step. Because I know I will make this pattern again (I was already envisioning an olive green with black buttons while finishing this version), I think I might try flipping the packet to the right side so that the edge is more pronounced. I’ve seen plackets done both ways and the underside placket seems cleaner/simpler, while the exposed placket is a more modern decorative finish. Yay for options!

Skirt guts

I did all of my serging in white because 1. I wasn’t going to buy 4 spools of ochre thread when this is the only fabric in that color that I currently own, and 2. I kind of like the look of a contrasting but complimentary serger thread on the interior garment seams. It might be hard to tell from this picture, but I sewed on the waistband in reverse (yes, on purpose!) in accordance with Lauren of Lladybird‘s recommendation. On one of her many jeans-making posts, she mentioned that if you sew the waistband right side to the pants wrong side FIRST, then fold, press under the seam allowance, and topstitch on the RIGHT side as opposed to the wrong side as recommended by most instructions, then you have complete control over the look of the topstitching on the outside. Brilliant!

Oh, and I used to HATE putting in the two rows of basting stitches for gathering, just like how I hate staystitching or doing any other stitching that is meant to be removed. It has always seemed, just like most other temporary things, to be a waste of time. And yet the results when you gather the fabric using two well-placed rows of basting are so pretty and even. The pattern recommends doing two rows that end at each quarter of the skirt (i.e., right front, right back, left back, left front as separate basting sections) so that you aren’t trying to work the fabric of the entire skirt across one set of stitches. It definitely allows for more control and easier gathering.

My next project is to sew up a faux wrap dress using the rayon jersey I bought at the same time as this ochre linen/rayon. I was good and only got two cuts of fabric while visiting the new Joann location near my house, but they had so many lovely things! Tons of nice cottons and rayons. It’s nice to know that I can go somewhere local for fashion fabrics!

Julia

Mystery Blogger Award

One of my favorite things about the online sewing community is that we are all over the globe, encompassing many cultures and backgrounds, yet we are all held together by a common (not gonna say thread, that’s too easy) interest. We are so different, but I’ll be honest – with a lot of the sewing blogs that I follow, I feel as if the authors are my friends even though we have never met; I know I am not the only one who thinks that way, either.

Thus, I think of the wonderful Sarah of Wanderstitch as my friend across the pond and I look forward to her Sunday posts. We have similar figures, so I find it helpful to see what styles and silhouettes she chooses; and it’s especially fun to see her fabric choices because our coloring and print preferences are quite different. It’s funny – I’m usually not a frequent commenter on blogs, but I have gotten in the habit of commenting on almost all of Sarah’s posts because they invite dialogue. Sometimes I just cannot keep my thoughts to myself 😉

When I read her post today and got to the part where she nominated me for the Mystery Blogger Award, I did a Sheila Broflovski:

Sheila WHAT

Rather than restate everything that is already codified elsewhere, here is a link to the original Mystery Blogger Award post on Okoto Enigma’s blog.

So, three things about myself that I haven’t already said in my “About” section…

  1. When I first graduated from high school, I wanted to be a bio technician. My long-term plan was to eventually become a genetic counselor because I found genetic “translation” fascinating. I even won first prize in the annual biotech competition at my local community college, which involved performing what is called gel electrophoresis. However, the program I was in (at that same community college where I won the prize) was designed for research rather than diagnostics, which requires a different set of skills. Also, I realized that there was no way I could cope with a job that required me to essentially go to work every day and tell people that their kids were going to be screwed up. I did not and do not have the emotional fortitude for that. So I switched my major to English, because WHY NOT?! And now I am a college English Professor.
  2. Even though I’m not afraid of bugs or spiders and I am certainly not bothered by killing them, I absolutely cannot step on them. I am hypersensitive to certain things, and the sound/feel of a crunching carapace gives me the heebie jeebies like no other. Raid is my best friend in this regard, and my cats are great at notifying me of insect incursions so that I can be armed and ready to eliminate the interlopers without using shoes to do it.
  3. It’s pretty obvious if you enter my house, but not so much on the internet – Elephants have been my favorite animal since I was about 2 years old. I have tons of elephant art, decorations, figurines, etc. And the collection will continue to grow, because anyone who wants to give me a gift tends to default to something with an elephant on it. I am fine with this. I don’t particularly care about the luck aspect, so I do not have a preference for trunk-up poses. If it looks like an elephant, I will like it!

Henna Elephant

If I were to get a tattoo, it would be of this lovely mandala elephant! I wish I knew who drew it so that I could give him/her mad props.

Now for Sarah’s questions…

  1. If I could time travel, when would I go to? My initial impulse is to say Regency England, because I am a huge fan of Regency romances (M.C. Beaton/Marion Chesney is my hero!). But definitely not London because I’m not a city person – I’d probably be governess to some aristocrat’s bratty children on his country estate or whatever.
  2. If I could have one superpower, what would it be? I’m not sure if this is common or weirdly unique, but I have long wished that I could shoot a whirlwind out of my hands. When I worked at Barnes and Noble in my early 20s, I used to imagine myself flinging my arms at the shelves and generating a whirlwind that would blow books everywhere. And then I would immediately feel horrible because OMG DON’T DAMAGE THE BOOKS! But the image of papers flying everywhere just struck me as cool. Also, it would be nice to be able to blow cars off the road when their drivers are acting like assholes.
  3. What is the dumbest way you’ve been injured? So, funny story – being 4’10”, my face is at elbow-height for most guys and a lot of girls, so I refuse to play most sports for my own personal safety. When I was going through Navy Officer Candidate School, my class of 15 people was doing some pretty intense physical training. At a break in the exercises, our Senior Chief yelled at us to hydrate; all of our canteens were piled together in a corner, so there was a bit of a mob situation while we sorted out whose was whose, and we only had 60 seconds to get them, drink water, and then get back in line. Reminder – my face is at elbow level for most guys. Well, one of my friends went to turn around and elbowed me right in the nose. Fortunately it didn’t break, but it did start to bleed. I ran back to the line and was standing at attention while pinching the bridge of my nose with one hand to keep from bleeding all over the place. Our Senior Chief looked at me and said, “What’s wrong with you?!” and I yelled “ELBOW TO THE FACE, SIR!” He said, “get in the head!” so I ran to the bathroom to patch myself up. Thank God it wasn’t too bad, but it did hurt like hell. At least it was funny, even at the time, and I still laugh when I think about it.
  4. Would I rather know the history of every object I touched or be able to talk to animals? I’ve read books with characters that can do both of these things, and I think I’d much rather know the history of objects; animals are pretty damn stupid and I don’t even like listening to other people talk most of the time… But I enjoy history, particularly from a cultural anthropology perspective, so I think if I did have the ability to know the history of objects, I would spend WAY too much time at estate sales =) BTW, one of my favorite series that involves a character that can sense the history of an object is the Witchcraft Mysteries series by Juliet Blackwell. They are technically cozy mysteries and are set in present-day San Francisco.
  5. If I could only eat three foods for the rest of my life, what would they be? The first one is easy – Carnation Instant Breakfast (I know they changed the name to Breakfast Essentials but I don’t care) in milk chocolate, preferably the sugar-free version. I have drank one of these mixes nearly every morning for two decades. I also use it as a meal replacer when I am trying to lose/maintain weight. I really should own stock in the stuff at this point. For the second one, I desperately want to say turtle cheesecake, but I know that that would get old fast, so instead I’ll say Mushroom Fettuccine as made by Lindsay at Pinch of Yum. OMG that stuff is addicting and I finally got myself off of the kick of eating it 4 times every week. Her food blog is my absolute favorite, BTW. And third’s gotta be pizza with Italian sausage. I’m not picky about crust, although I do tend to prefer regular rather than thin or deep dish.

Ok, I know I’m supposed to nominate other people to do this, but I think everyone I follow has already done it. Does that mean I need to follow more bloggers? Come on, people, ditch Instagram and get back to blogging! Instead, I’ll just list 5 questions and anyone who wants to can reply in the comments. Is that a good compromise? And be sure to link your blog, if you have one.

  1. If you had to teach a 15min class on anything, what topic would you pick?
  2. What is your favorite piece of clothing that you own?
  3. Cake or ice cream?
  4. What is one thing that other people do that you cannot stand? (only one!)
  5. If you could be an animal, what would you be?

Julia

A Little Bit of Union St.

I mentioned before that I’ve been cranking out t-shirts using the Union St. Tee pattern by Hey June Handmade. The pattern has been updated in the last year, and while I did buy it prior to the updates, I never made any using the pre-revision version. The post-revision version includes pattern pieces for a FBA if you are in need of extra room up top. Technically I should/could have used the FBA front piece (I’m a 30DD), but I actually prefer my tops to be more fitted in the bust and hip and loose in the waist so I just went with the standard B-cup front pattern piece as drafted.

Coral Front

Coral Back

Purple Front
My first two Union St. Tees were made using the scoop neck front; I love a good scoop neck and this one is perfect – not too low, not to high. However, my rough-and-ready laundry tendencies have resulted in some preliminary bacon neck, so I’m sticking with the V-neck for all future Union St. makes. The fabric I used for the purple and coral t-shirts is the wonderful Kaufman Laguna Jersey, bought from Fabric.com. It is the budget-friendly cotton-lycra knit that I plan to buy tons and tons more of in the future, after I have successfully worked through more of my stash.

Turquoise Front

This gorgeous turquoise (sold out! *gasp*) is Kaufman Dana Jersey, the fancy cousin to Laguna. It is a cotton/modal blend and oh, so wonderfully soft! Definitely worth the cost if you are interested in a bit of a splurge or have an enviable fabric budget.

Mauve Floral Front

Stripe Floral Front

These two floral V-necks are made from 100% cotton jersey that I bought at Hobby Lobby during a sale. I was surprised to see that Hobby Lobby now carries knits, and some 100% cotton ones at that. This fabric was nowhere near as soft as the Kaufman Laguna, but it was cute and cheap so what can I say? They get worn just as much as the others. =)

It’s worth noting for those of you who, like me, have pets and therefore have cat (or dog) hair embedded in all of your clothing – the higher quality the fiber and fabric, the LESS it will grab on to pet hair. I brush my clothes after I take them out of the dryer and I have noticed repeatedly that the two Hobby Lobby jersey tees are fur magnets, while the Kaufman tees barely need to be brushed. Yet another reason to invest in higher quality fabrics when you can.

I have two more V-neck Union St.s cut out and waiting to be sewn up – one in Kaufman Dana Ocean Green (which is actually a deep teal) and one in purple cotton jersey leftovers from a long-ago Renfrew tee. Then I will hopefully be done with my Union St. sewing for a bit and can move on to pants and skirts – two things I need more of and included on my Make Nine for this year.

– Julia